What is ADT ?
- It is Android Development Tool which extends Eclipse IDE (using version: 3.6.0) for development of android based applications.
- It accelerates the Android application development
It helps ,
- to creates application UI
- in debugging of Android application based on Android SDK
- to export (signed or unsigned) .apk files for application distribution
Installation of ADT and Android SDK
Steps:
1)Open Eclipse Menu [Help][Install New Software...]

2)Press [Add..] button

3)Provide ADT URL as shown below
Name: ADT Eclipse

6)After Plugin installation, restart Eclipse
8)After pressing [Finish] button Eclipse will start SDK installation
9) How to install Android SDK Separately,
- Download Android SDK: http://developer.android.com/sdk/index.html#download
- Extract the tar to the appropriate folder, example,
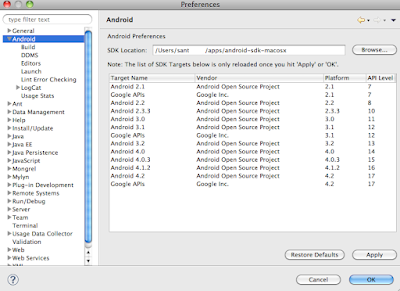
- Specify Android ADK location for Eclipse, (Using Eclipse/Preference)
10)How to update existing Android SDK using command line
/android-sdk-macosx/tools/android update sdk --no-ui
Above command will update existing Android SDK to latest available Android SD


No comments :
Post a Comment